SOAPydog
Main Menu

SOAPydog is a system for creating medical patient care reports primarily designed for Emergency Medical Services. The report will be formatted in the SOAP format. SOAP stands for Subjective, Objective, Assessment and Plan. These are the main categories of information. This system will allow you to write a consistent, clean, thorough report.
Let's look at getting around the app.

Clicking on the menu will bring up options to go to other pages on the website.
The app contains a lot of information which can be filled in. Sometimes it is nice to condense what you are looking at. This is especially helpful if only a small portion of the template will be used for your current report. There are a couple of ways to condense the information. At the top of a couple of the sections are the COLLAPSE ALL and EXPAND ALL buttons.
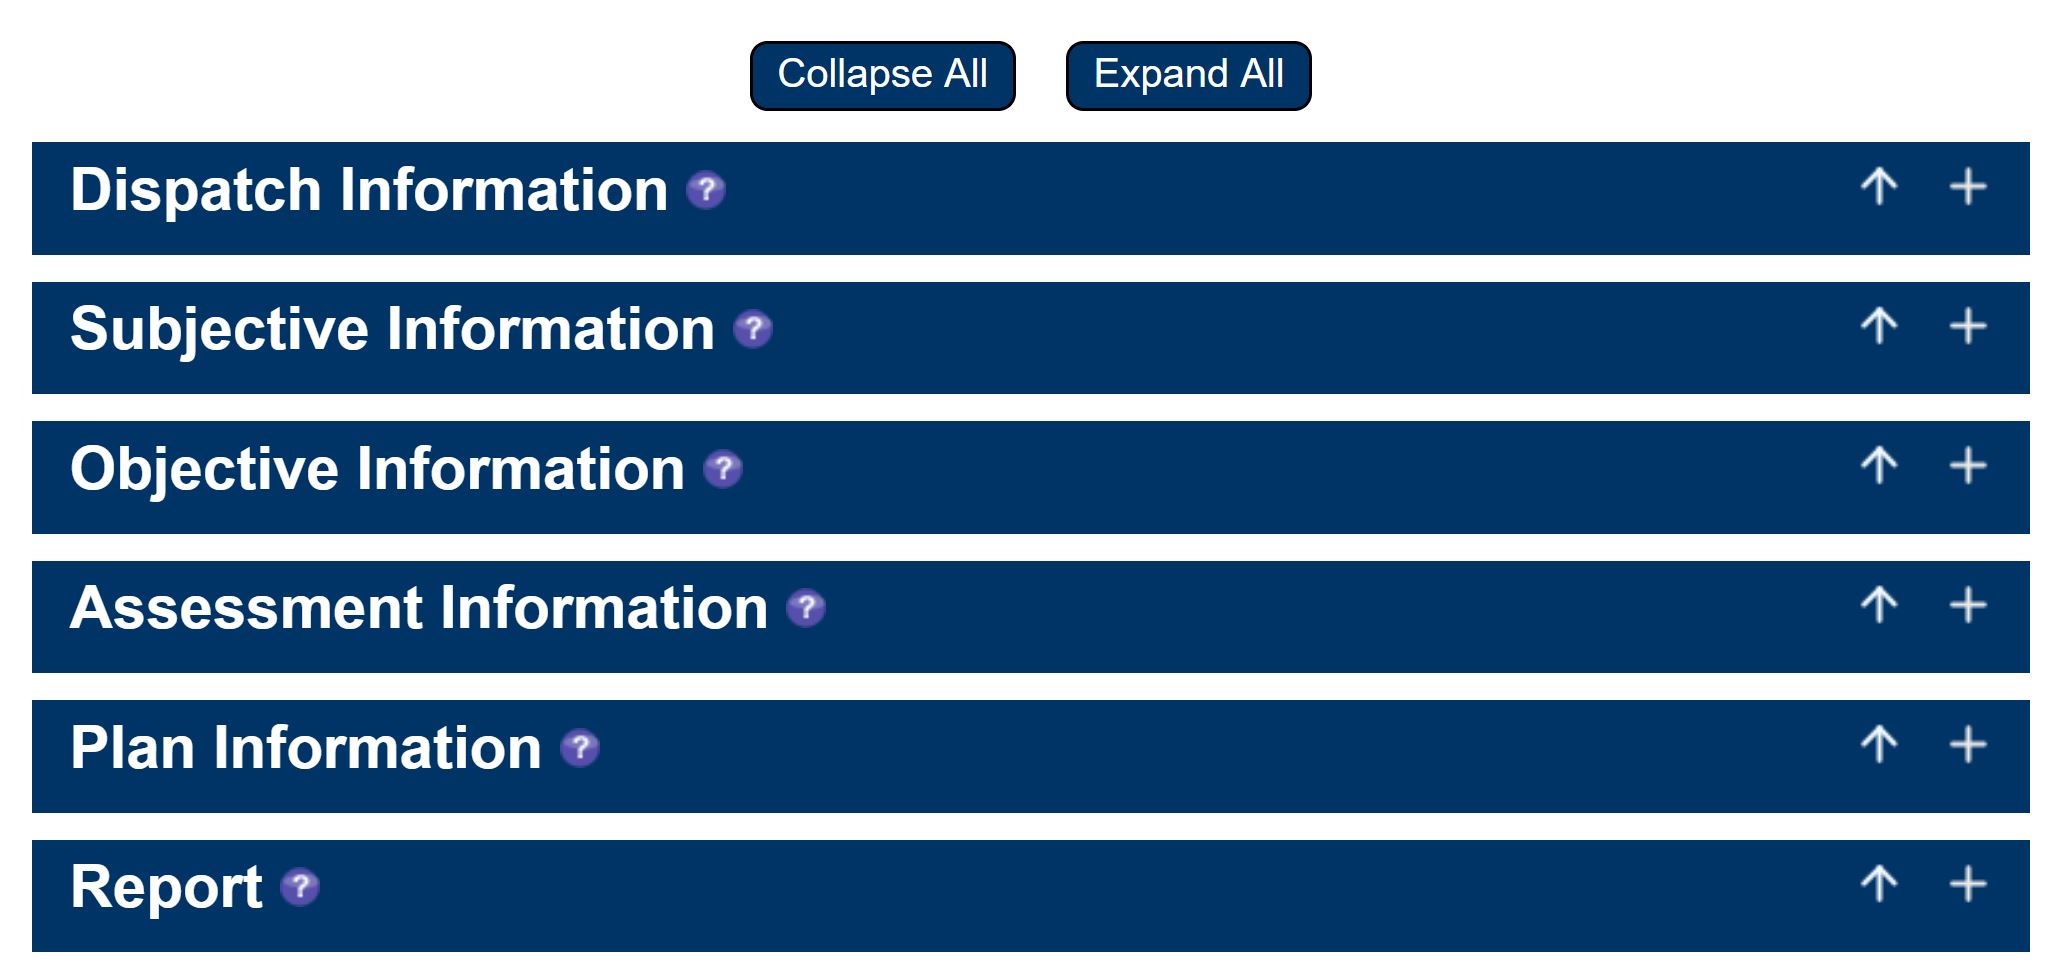
These buttons will collapse or expand the sections below it. In the example above, each of the SOAP sections can be collapsed.
Another way to collapse or expand a section is with the  or
or
 icon on the right side of the section.
By clicking the icon you are able to open up or expand the section.
By clicking the icon you are able to close or collapse the section.
icon on the right side of the section.
By clicking the icon you are able to open up or expand the section.
By clicking the icon you are able to close or collapse the section.
Help for any section can be found by placing the cursor over the nearest ![]() icon. If you are using a
touch screen then touching on the icon will also bring up help for the section.
icon. If you are using a
touch screen then touching on the icon will also bring up help for the section.
Clicking on the  will bring you to the top of the page. This is useful to get back to
the COLLAPSE ALL button to condense the sections and then open the section you are working on.
will bring you to the top of the page. This is useful to get back to
the COLLAPSE ALL button to condense the sections and then open the section you are working on.
The in the procedure cards will take you to the top of the PLAN section so you can choose
more procedures.
There are many items to be filled out in the app. Check the boxes and fill in the information which are important to your incident.
Not everything will be applicable to your incident. If an item is not checked or filled in then it will not be a part of your
final report.
One of the advantages of using a template like this consistently is it will improve your assessment skills in the field.
You will think of items in the report and persue asking questions around that area.
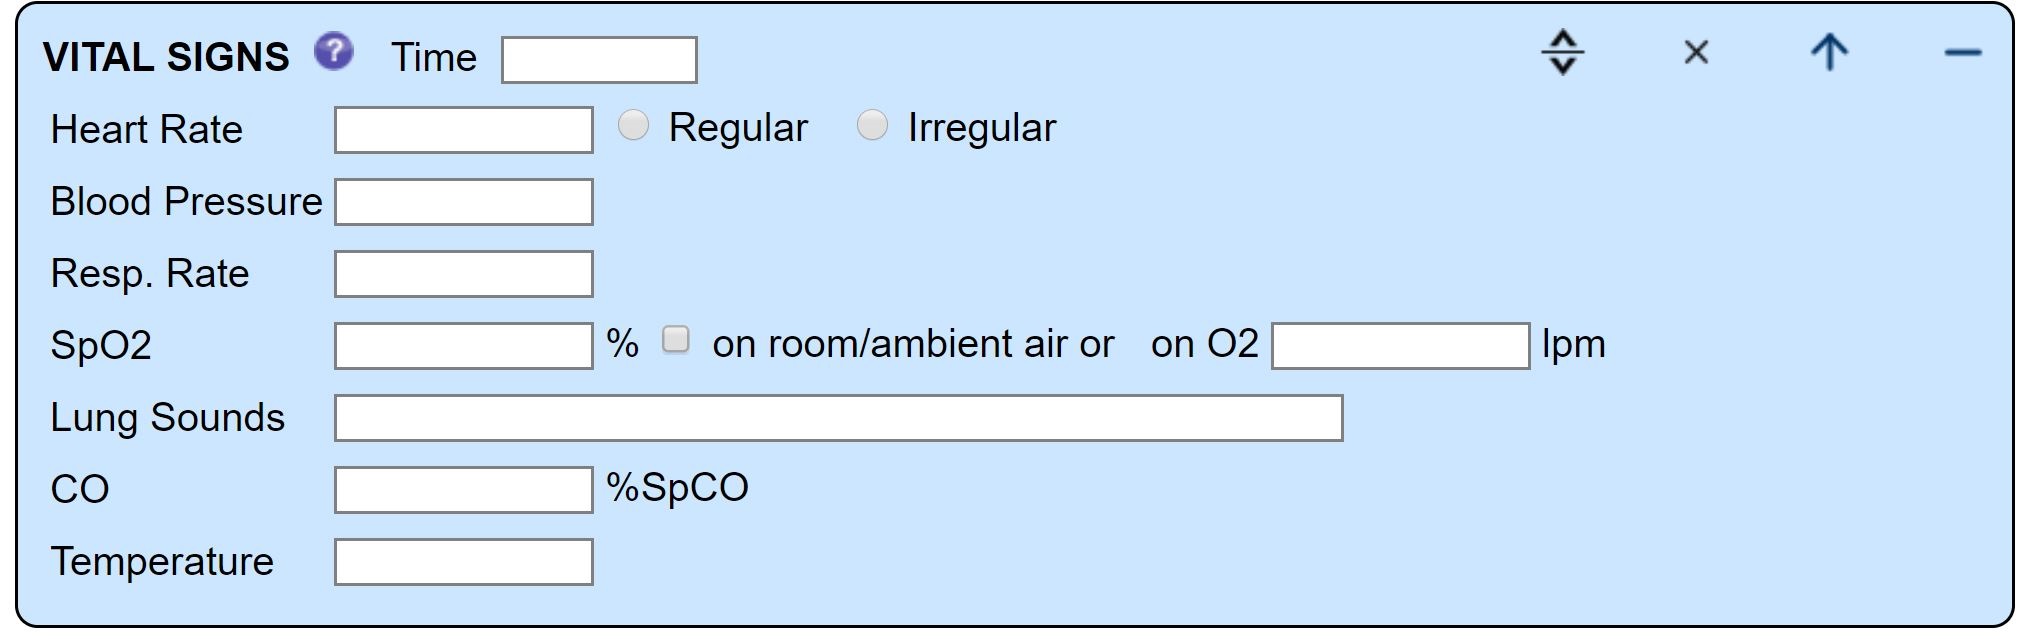
Fill in information about your incident including date, incident #, address, times, apparatus and response, personnel, mileage and dispatch information.


Pertinent positives and negatives in your exam are an important part of your report. It makes for a more complete report if you can document what you see and also what you did not see. In the OBJECTIVE exam section there is a way for you to document both positives and negatives.
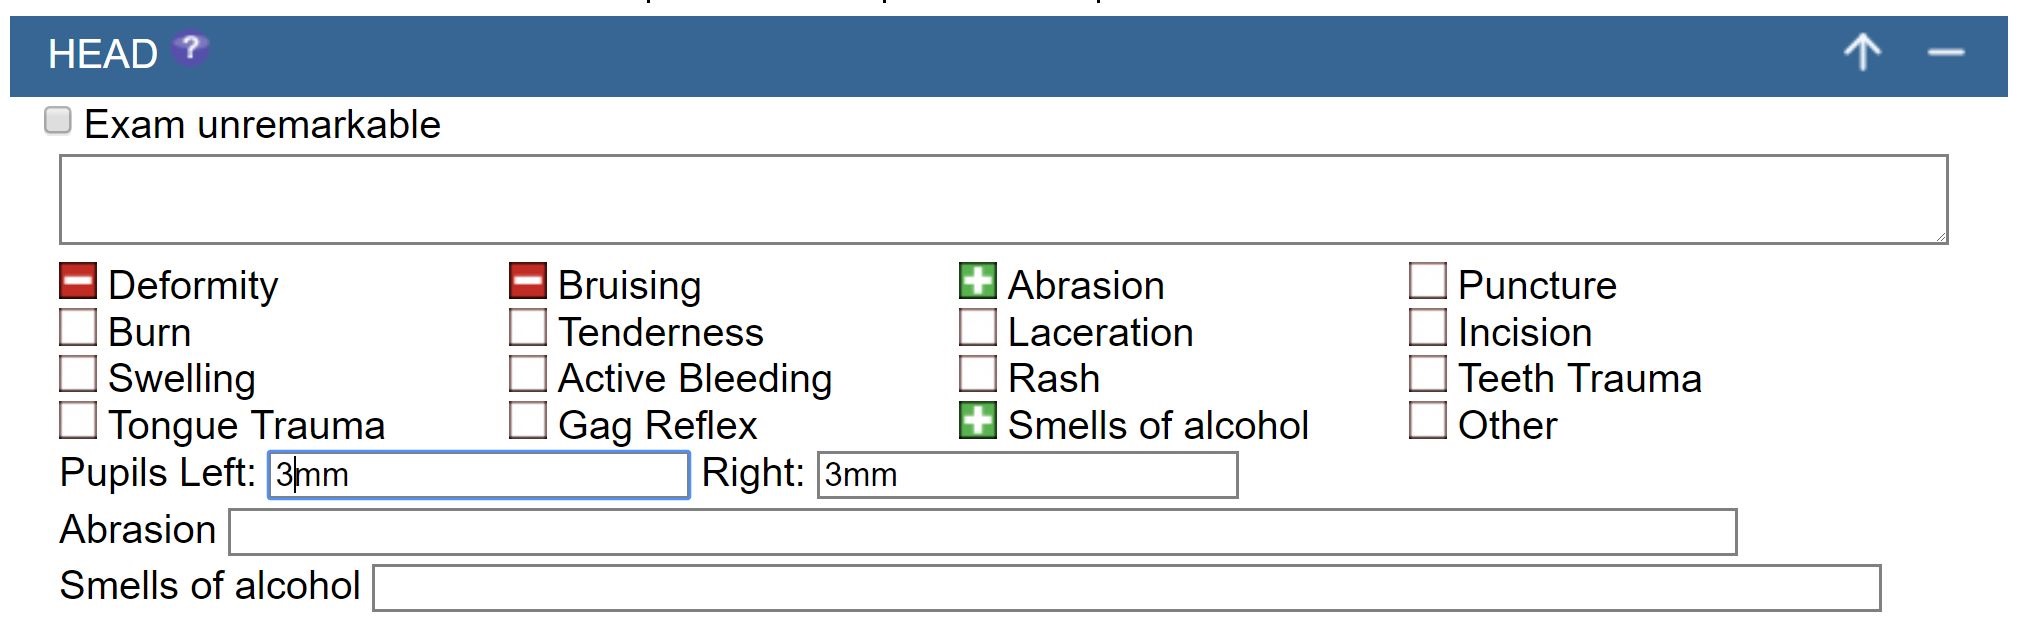
First, let's look at the situation where your exam for this body part is grossly unremarkable. In the upper left corner of the section is a checkbox for notating the exam was unremarkable. This will collapse the section and not allow any other input for that section. Pro tip - do not check unremarkable for any body system if you did not actually do the exam.
Each item underneath the section has 3 possible responses.
1)  - nothing will be documented.
2)  - a negative sign or symptom.
3)  - a positive sign or symptom.
If the negative or positive state is abnormal then an area will appear below it so you can describe more about the sign/symptom.
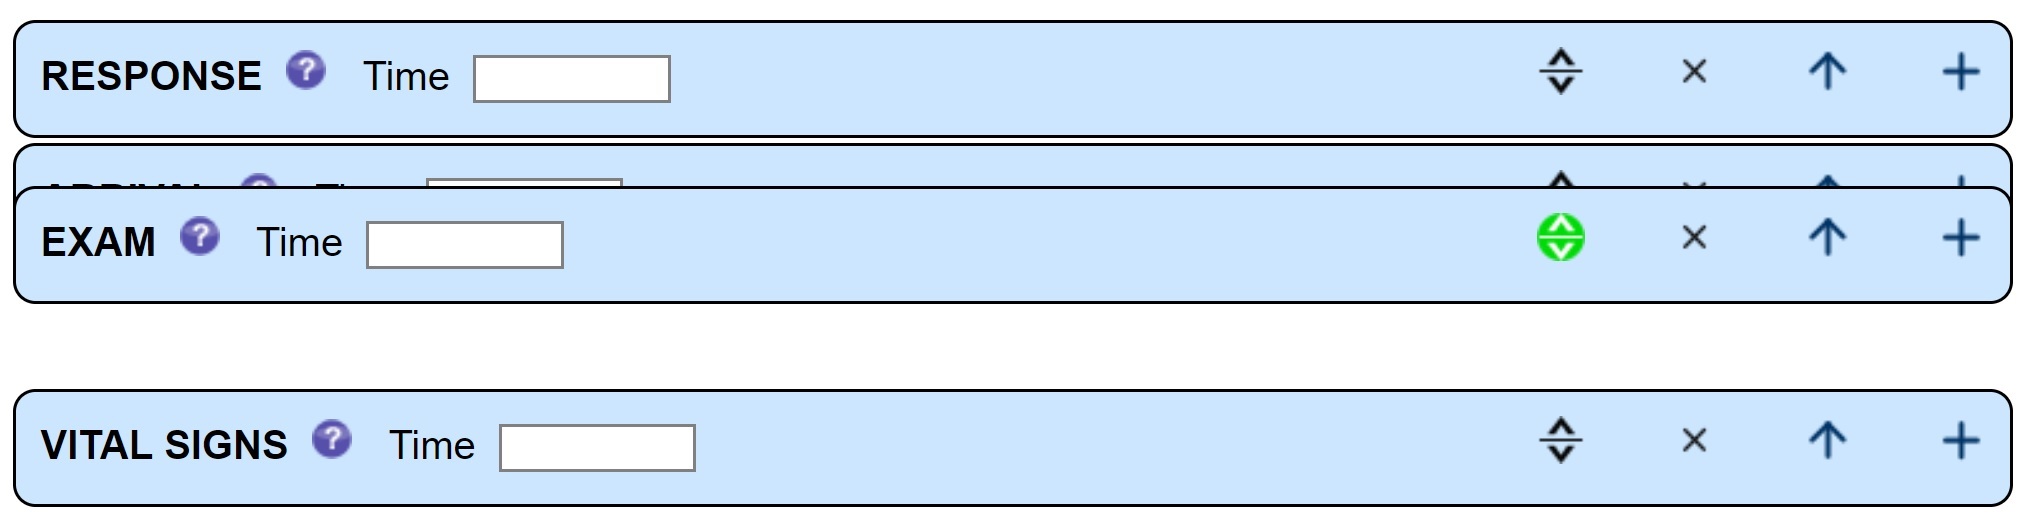
The PLAN section is where you document the procedures you have done.
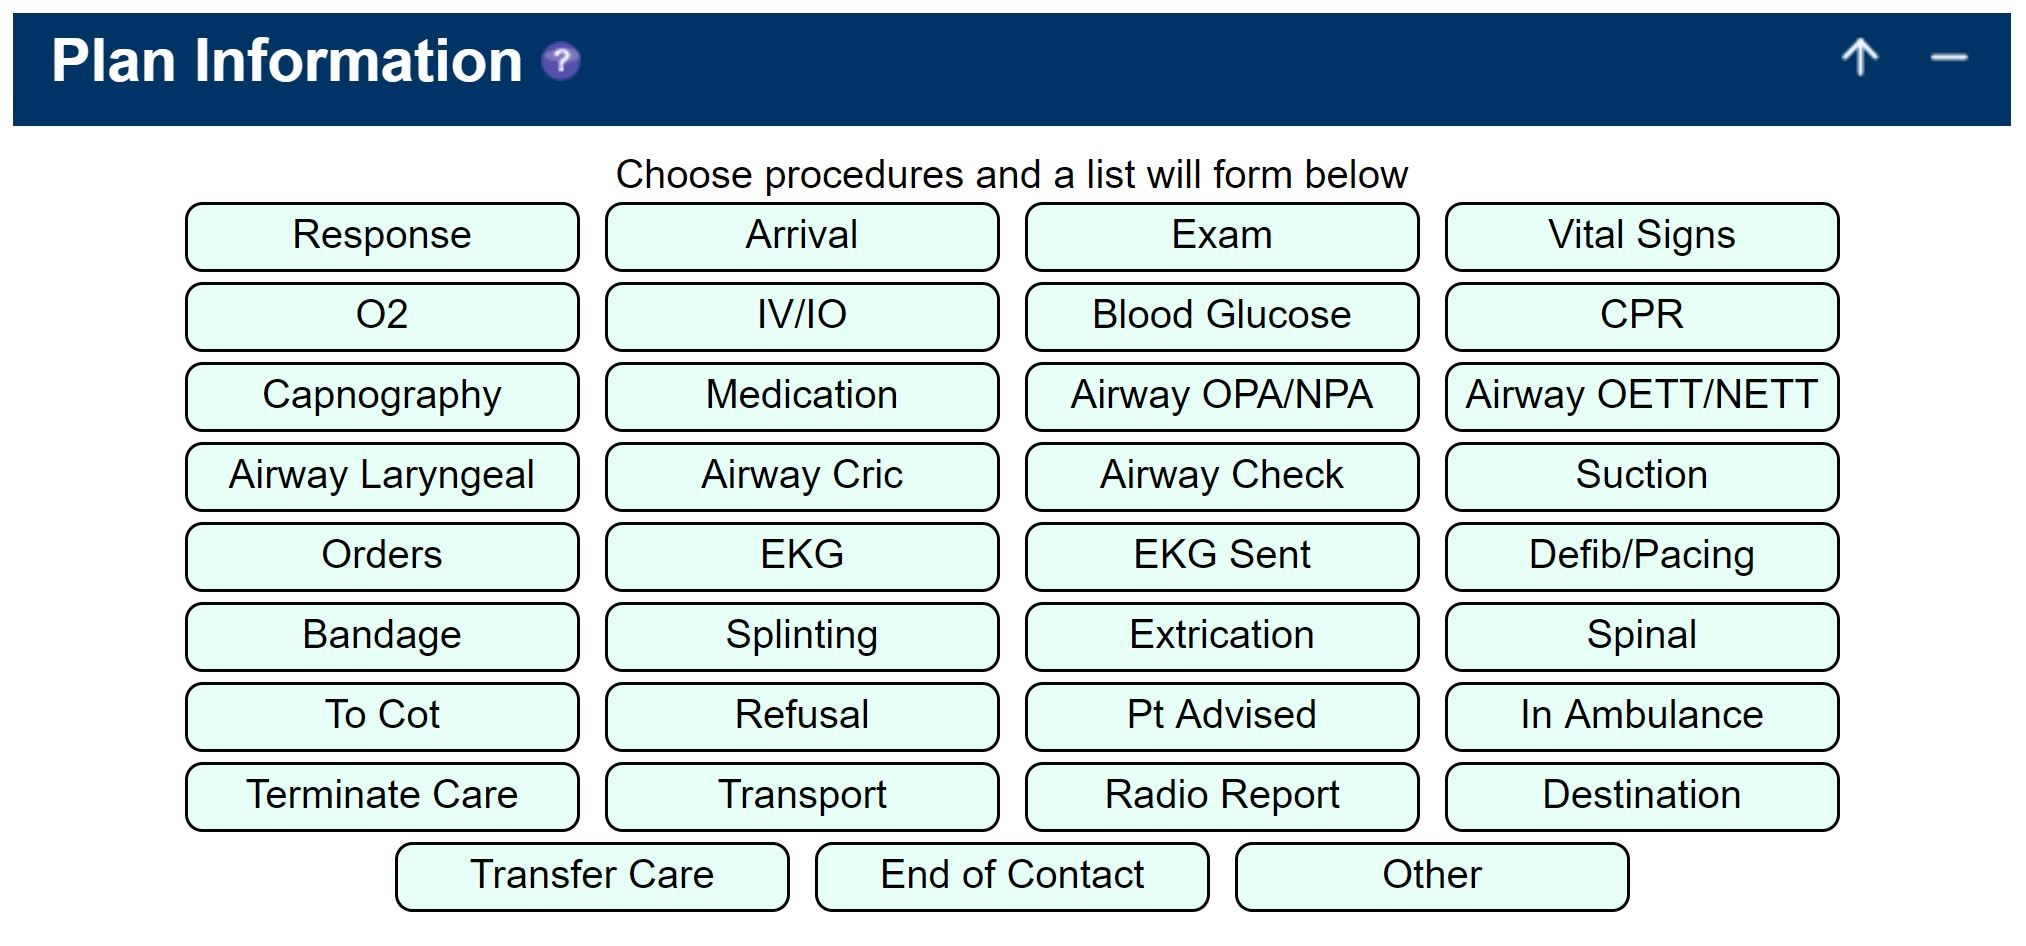
Click on each procedure you did with your patient. This will start a list below of procedure cards. You will see the procedure name, a help icon, a place for the time of the procedure and some icons to the right.
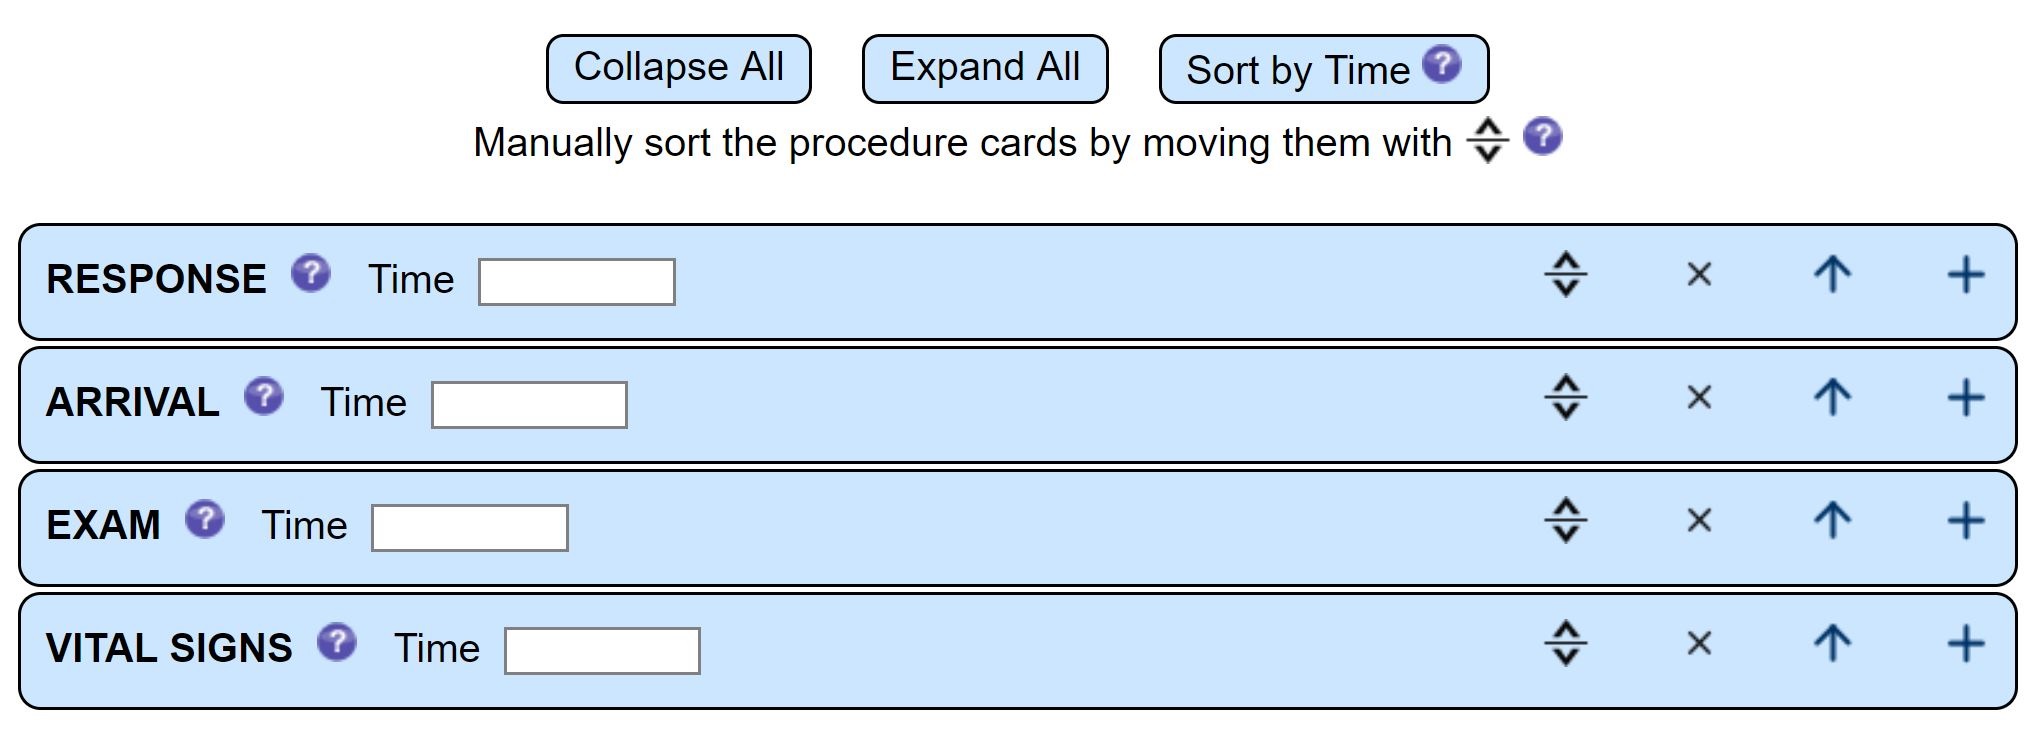
Let's look at the icons on the right.
 - allows you to manually move and rearrange the order of the cards. (Not available in IE10 or older)
 - allows you to delete a procedure card.
- moves to the top of the PLAN section.
- opens or closes the procedure card for more or less information.
You are able to manually sort the order of the procedure cards by using the move icon. Click and hold on the icon while moving the card to another place in the sequence.
Another way to sort the procedures is by time. If you choose to enter a time for the procedure then the
SORT BY TIME button
will automatically rearrange the cards in chronological order.
The accepted time formats are anything similar to:
2130, 930, 0930, 9:30am, 930pm. You may also enter PTA or pta (Prior To Arrival).
Anything else in the TIME information will
not be considered.
The order in which the SORT BY TIME will sort is according to the following rules (if you do not want to place a time on everything):
1) PTA cards.
2) Cards without times which are prior to the first card with a time.
3) Cards with times, in chronological order.
4) Cards without times which are after the first card with a time.
If you want more information documented about a procedure then open the card with the
icon.
There are 2 possible outcomes in the final report for your procedures:
1) The procedures with no TIMES and no information on them will show on the same line with their procedure name.
ie. Response, Arrival, Exam, Vital Signs
2) Otherwise each procedure will show on a separate line with the procedure time and information.

In the REPORT section there is a place for you to enter your name as the author of the report and time stamp it.
Click the CREATE REPORT button and your final report will be generated.
If there is something not quite right about the report then you can go back up to a section and make changes and then click the
CREATE REPORT button again.
Also, you have full ability to edit anything in the final report.
You may copy and paste the report for your own use.